Today is a big day here on Home Coming. Today we are welcoming our first guest contributor to the blog, Elisha from Pneumatic Addict Furniture! I shared some of her talents with you earlier this month - from welding to upholstering, I have a feeling we're going to be learning a lot!
Nice to meet you! I'm Elisha and I blog at Pneumatic Addict Furniture.
I'm a serious cheapskate DIYer with a love for wood! I love cutting it, routing it, painting it, but what I enjoy the most it taking a pile of wood or a castoff piece of furniture, tweaking it and making it into a quality item.
"Do you mind if I try fumigating this here chair Clark? Its a quality item."
Friends and family know, be careful if you ask me a question. I really like to share info on something I'm passionate about, and you might just become an expert on the subject if you let me keep talking. I LOVE learning and just assume everyone else does too. I have lots of tutorials and inspiration over at my blog.
I die inside just a little bit every time I hear a woman say "I'll have to get my (insert male title here) to cut/sand/nail that for me." Yes, power tools can be scary. Be a tough chick! There are no gender restrictions at the hardware store.
I just finished my most recent furniture tweak. I took a old, oddly proportioned coffee table and turned it into a diamond-tufted, upholstered bench.
I can't believe I forgot to take a "before" photo! The original color was that yellow-ish, cream color every piece of french furniture was painted last century. The top was a slab of cultured marble that looked like it was added later. The plan was to incorporate it into a different table. I pulled it off and had it leaning against the wall in the garage.... then my boys found it. I was able to save one larger piece.
Some pieces I have to get really creative, or put a lot of thought into what I want it to look like. As soon as I saw this table base, I got an idea. Go glam.
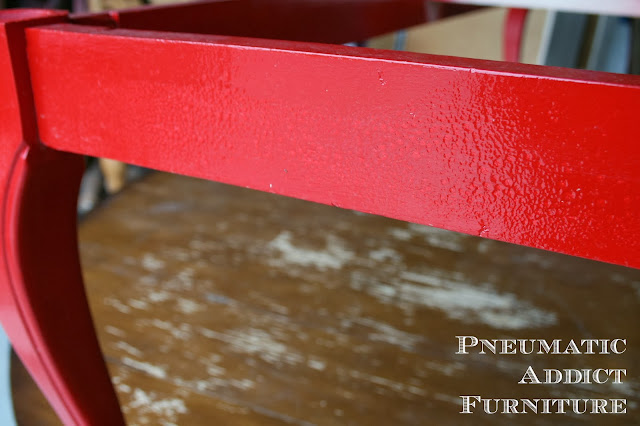
I gave the whole thing a light sanding, and then went for the spray lacquer. Noticed I skipped an important step? This is what happens when you don't wipe a grimy piece of furniture down with TSP
So back to the sandpaper I went. Sigh.
Luckily, once I sanded off the orange-peel, thoroughly cleaned the surface, 2 coats of lacquer sprayed on nicely. I followed up with 3 coats of clear gloss to protect my lacquer and give it a mirror finish.
Next, was time to address the cushion.
I cut a piece of 1/2 inch OSB and 3" foam down to the same size of frame. Using spray adhesive, I attached the foam to the OSB, and began to lay out my tufting pattern. I started by drawing my horizontal lines, then made a mark every 5 inches on the top and bottom lines. The next step was to line up diagonal marks with a ruler, and where the ruler intersected the center line, create my center mark.
I wanted to create a lush, deep tufted look. In order to get my tufts deep enough, I needed to cut out holes in the foam where the marks are. Necessity is the mother of invention. I dug around my kitchen and found this little device. I think it came free with some cheap knifes we bought once. It supposed to be a citrus juicer.
It worked like a champ! After a few minutes and a whole lot of twisting, I had myself a nice little pile of DIY packing peanuts and a piece of swiss cheese foam.
After searching the fabric store, I couldn't find the right white fabric. Enter curtain panel. Its a nice, heavy weight fabric and I got two for around $10.
To ensure plushness, I draped the foam in 2 layers of batting, then the curtain panel.
Time for the fun part! Tufting. No, I'm not kidding. Tufting can be fun!
I've tufted several pieces of furniture before, and hands-down my favorite method is The Easy Way.
Another tip I would add about upholstering a deeply tufted piece is, don't just flip the foam over and start stapling the fabric down. Locate where the tufts are on the top, pull down tightly and secure that area first.
That creates rounded, plush sections around the perimeter.
Once I tightly secured all the fabric to the back of the foam and OSB, it still looked a little unfinished. I decided to make some piping to finish off the edges. You can buy cotton cord at a fabric store, but I use a much cheaper option. I bought this 100 ft spool of cotton clothes line for less than $4 and honestly, I can't tell a difference between it and the expensive stuff.
I added the piping to the bottom side of the OSB with hot glue and more staples, and attached the frame with pocket holes and screws.
Here's what it looks like all done.
Gotta love those glossy, curvy legs. It reminds me of red lipstick or patent leather heels. Totally glamorous.
I'm really happy I added the piping. Its a much more polished look. Wanna make you DIY upholstery look professional? Add some matching piping.
Not my "usual" style, but I'm digging it. Its still a tad on the short side for me, so I think I'll add some small, brass casters. What do you think?
Thanks for sharing with us, Elisha! We love having you as our guest. You did such a great job in creating a designer-worthy bench! Stop by Pneumatic Addict Furniture to see what else Elisha is creating.


